How to run Fastlane and GitLab with AppStore Connect API
In this brief tutorial, I am going to walk you through a relatively painless process of using .p8 certificates from App Store Connect API to authenticate during Fastlane builds. As we also use GitLab as our CI, I will also show you how to pass the key from GitLab to Fastlane script.
Step 1: Allow keys to be created
For this step, you need to be an account holder. If you are not an account holder, you need to ask him to do it for you.
Note: Keys are generated per organization. For example, if you are a developer on project A (First organization), project B (First organization), and project C (Second organization), you will have to ask account holders of both the First organization and Second organization to allow access.
The first step is to go to Users and Access (tab Keys), you will see something like in Image 1.
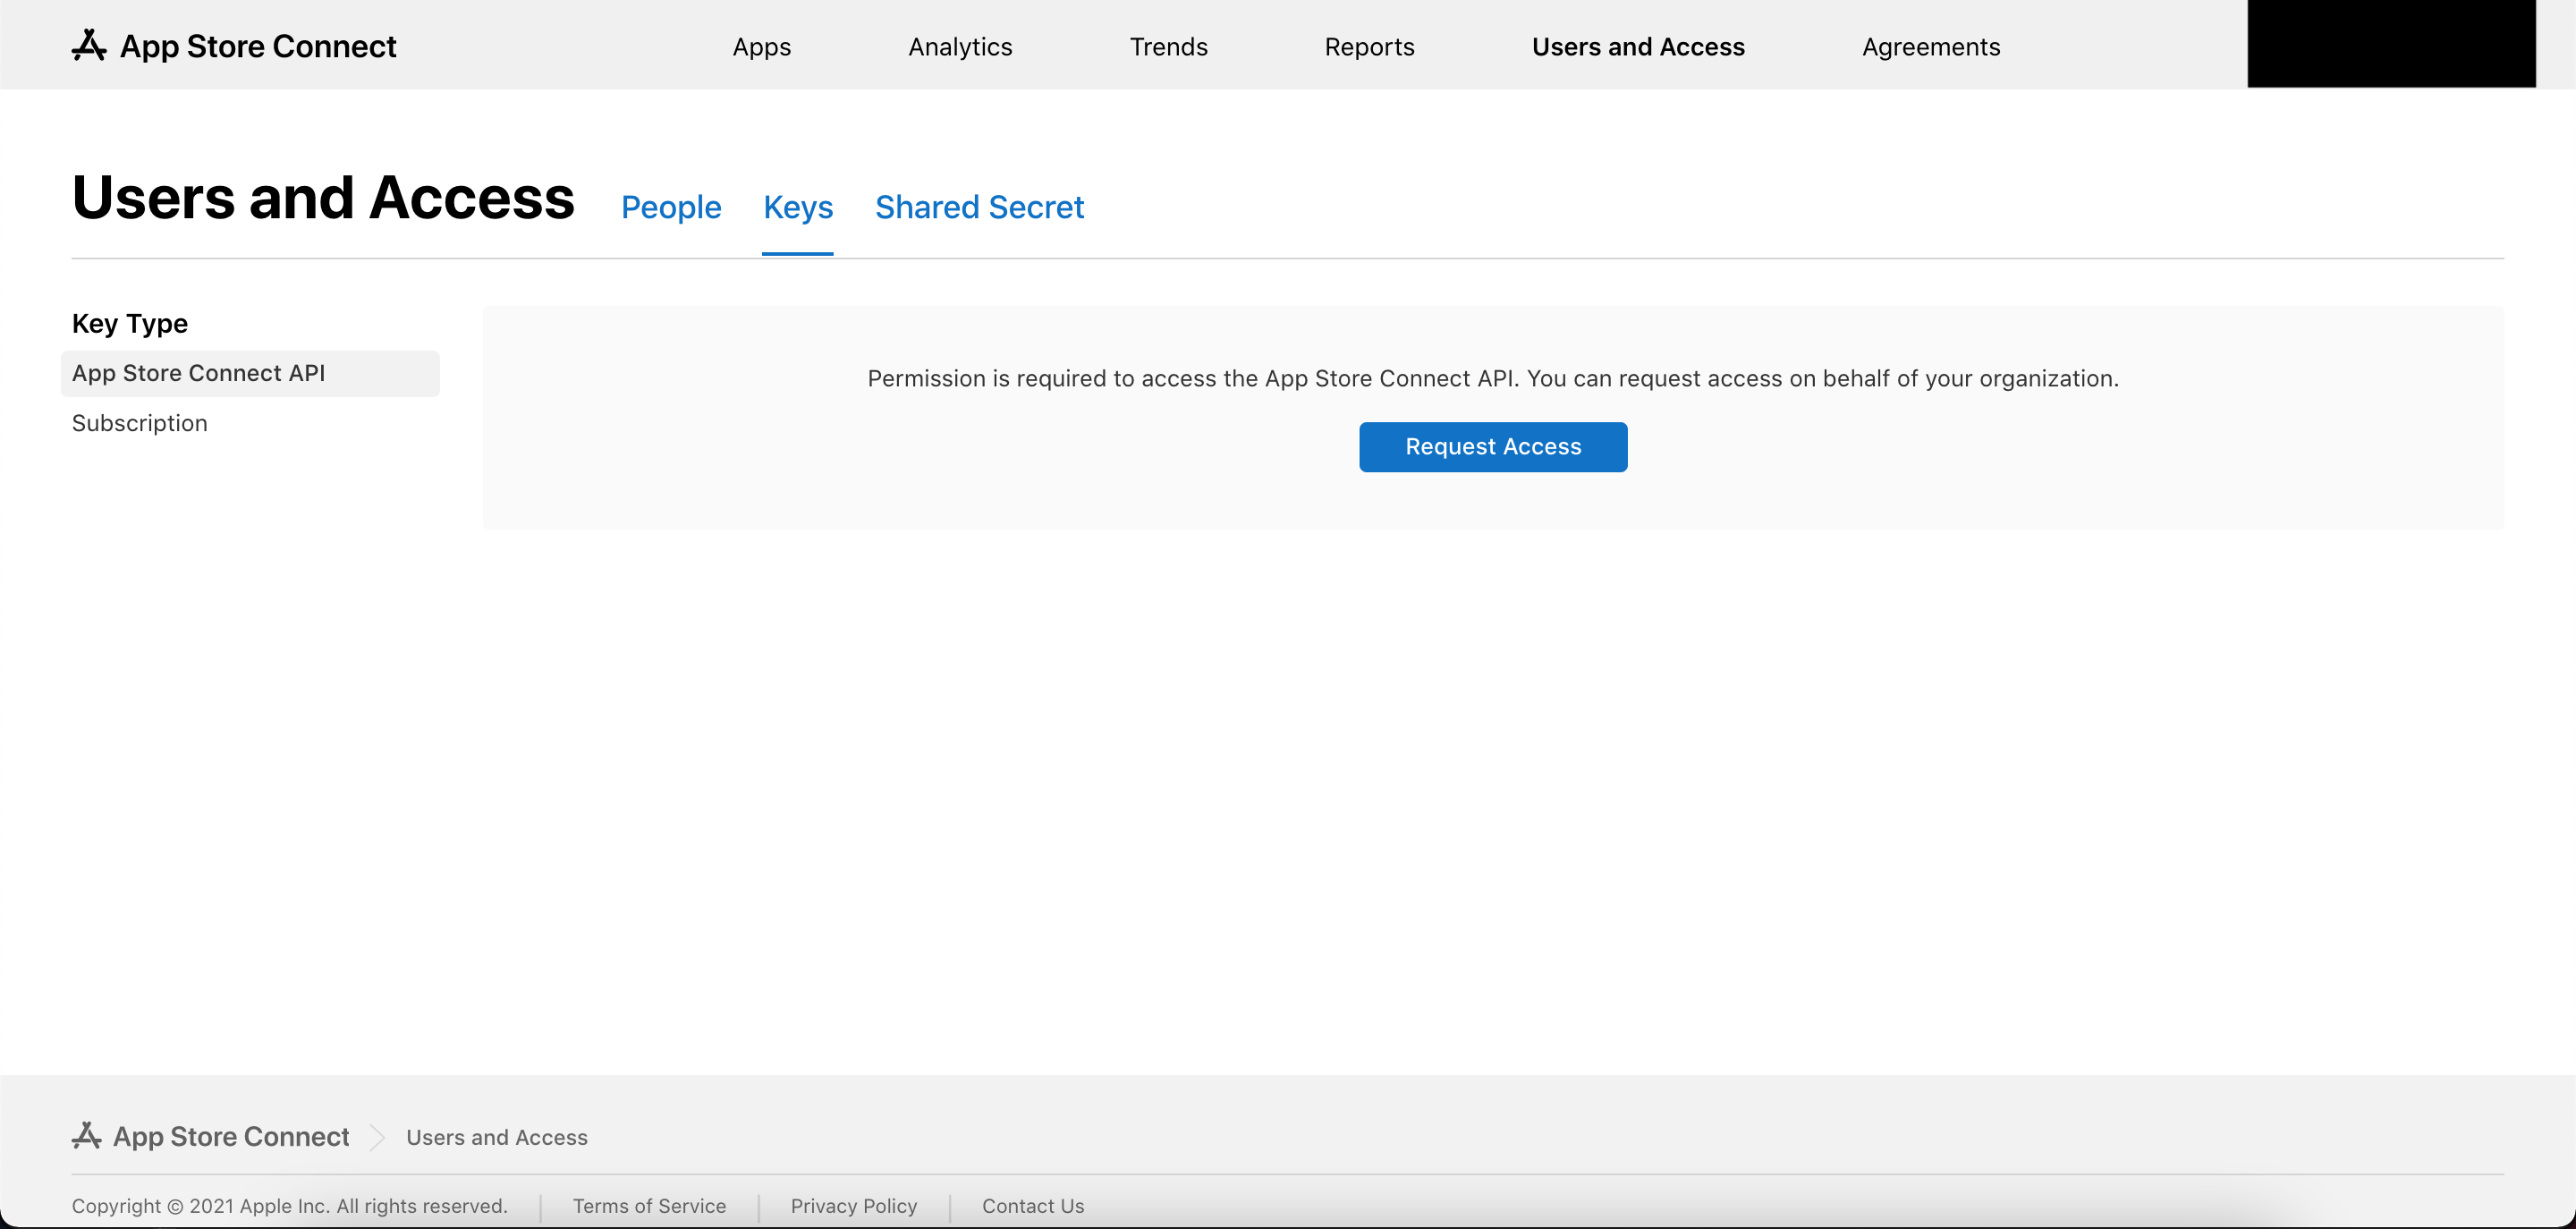
Image 1 - Starting point for the account holder
Following this, you need to click on the “Request Access” button. This will allow anyone with an Admin role to create new keys. You will see some kind of pact with the devil, or disclaimer if you prefer. You need to check the box and click submit. Visual reference in Image 2. If everything goes well, you are rewarded with the screen captured in Image 3.
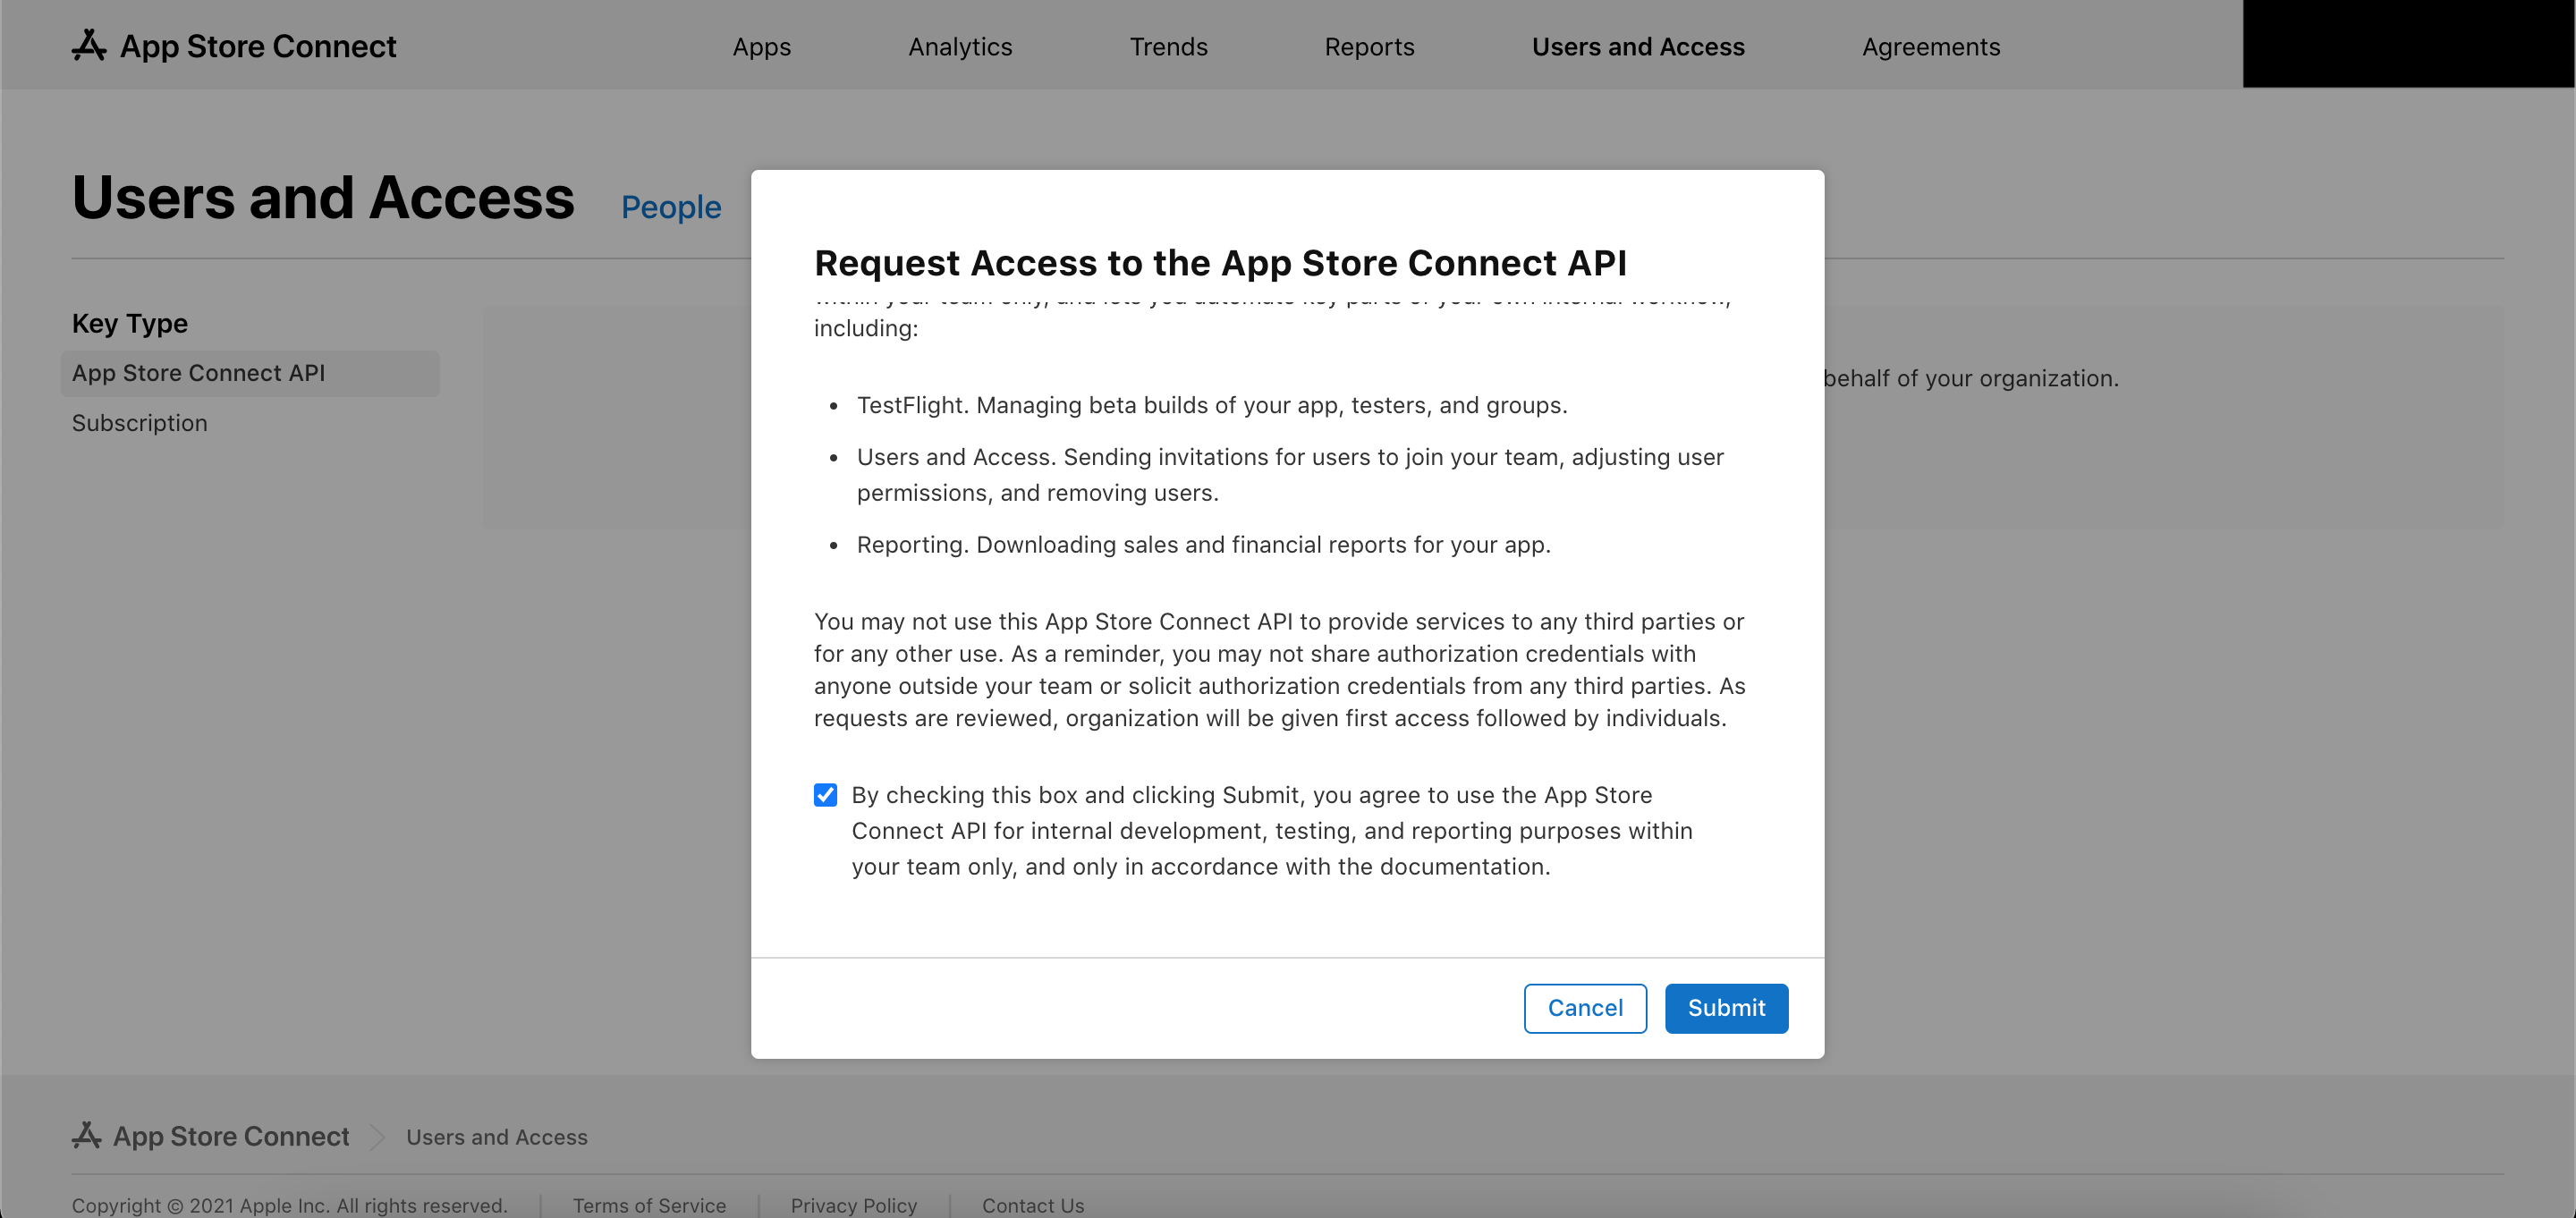
Image 2 - Disclaimer
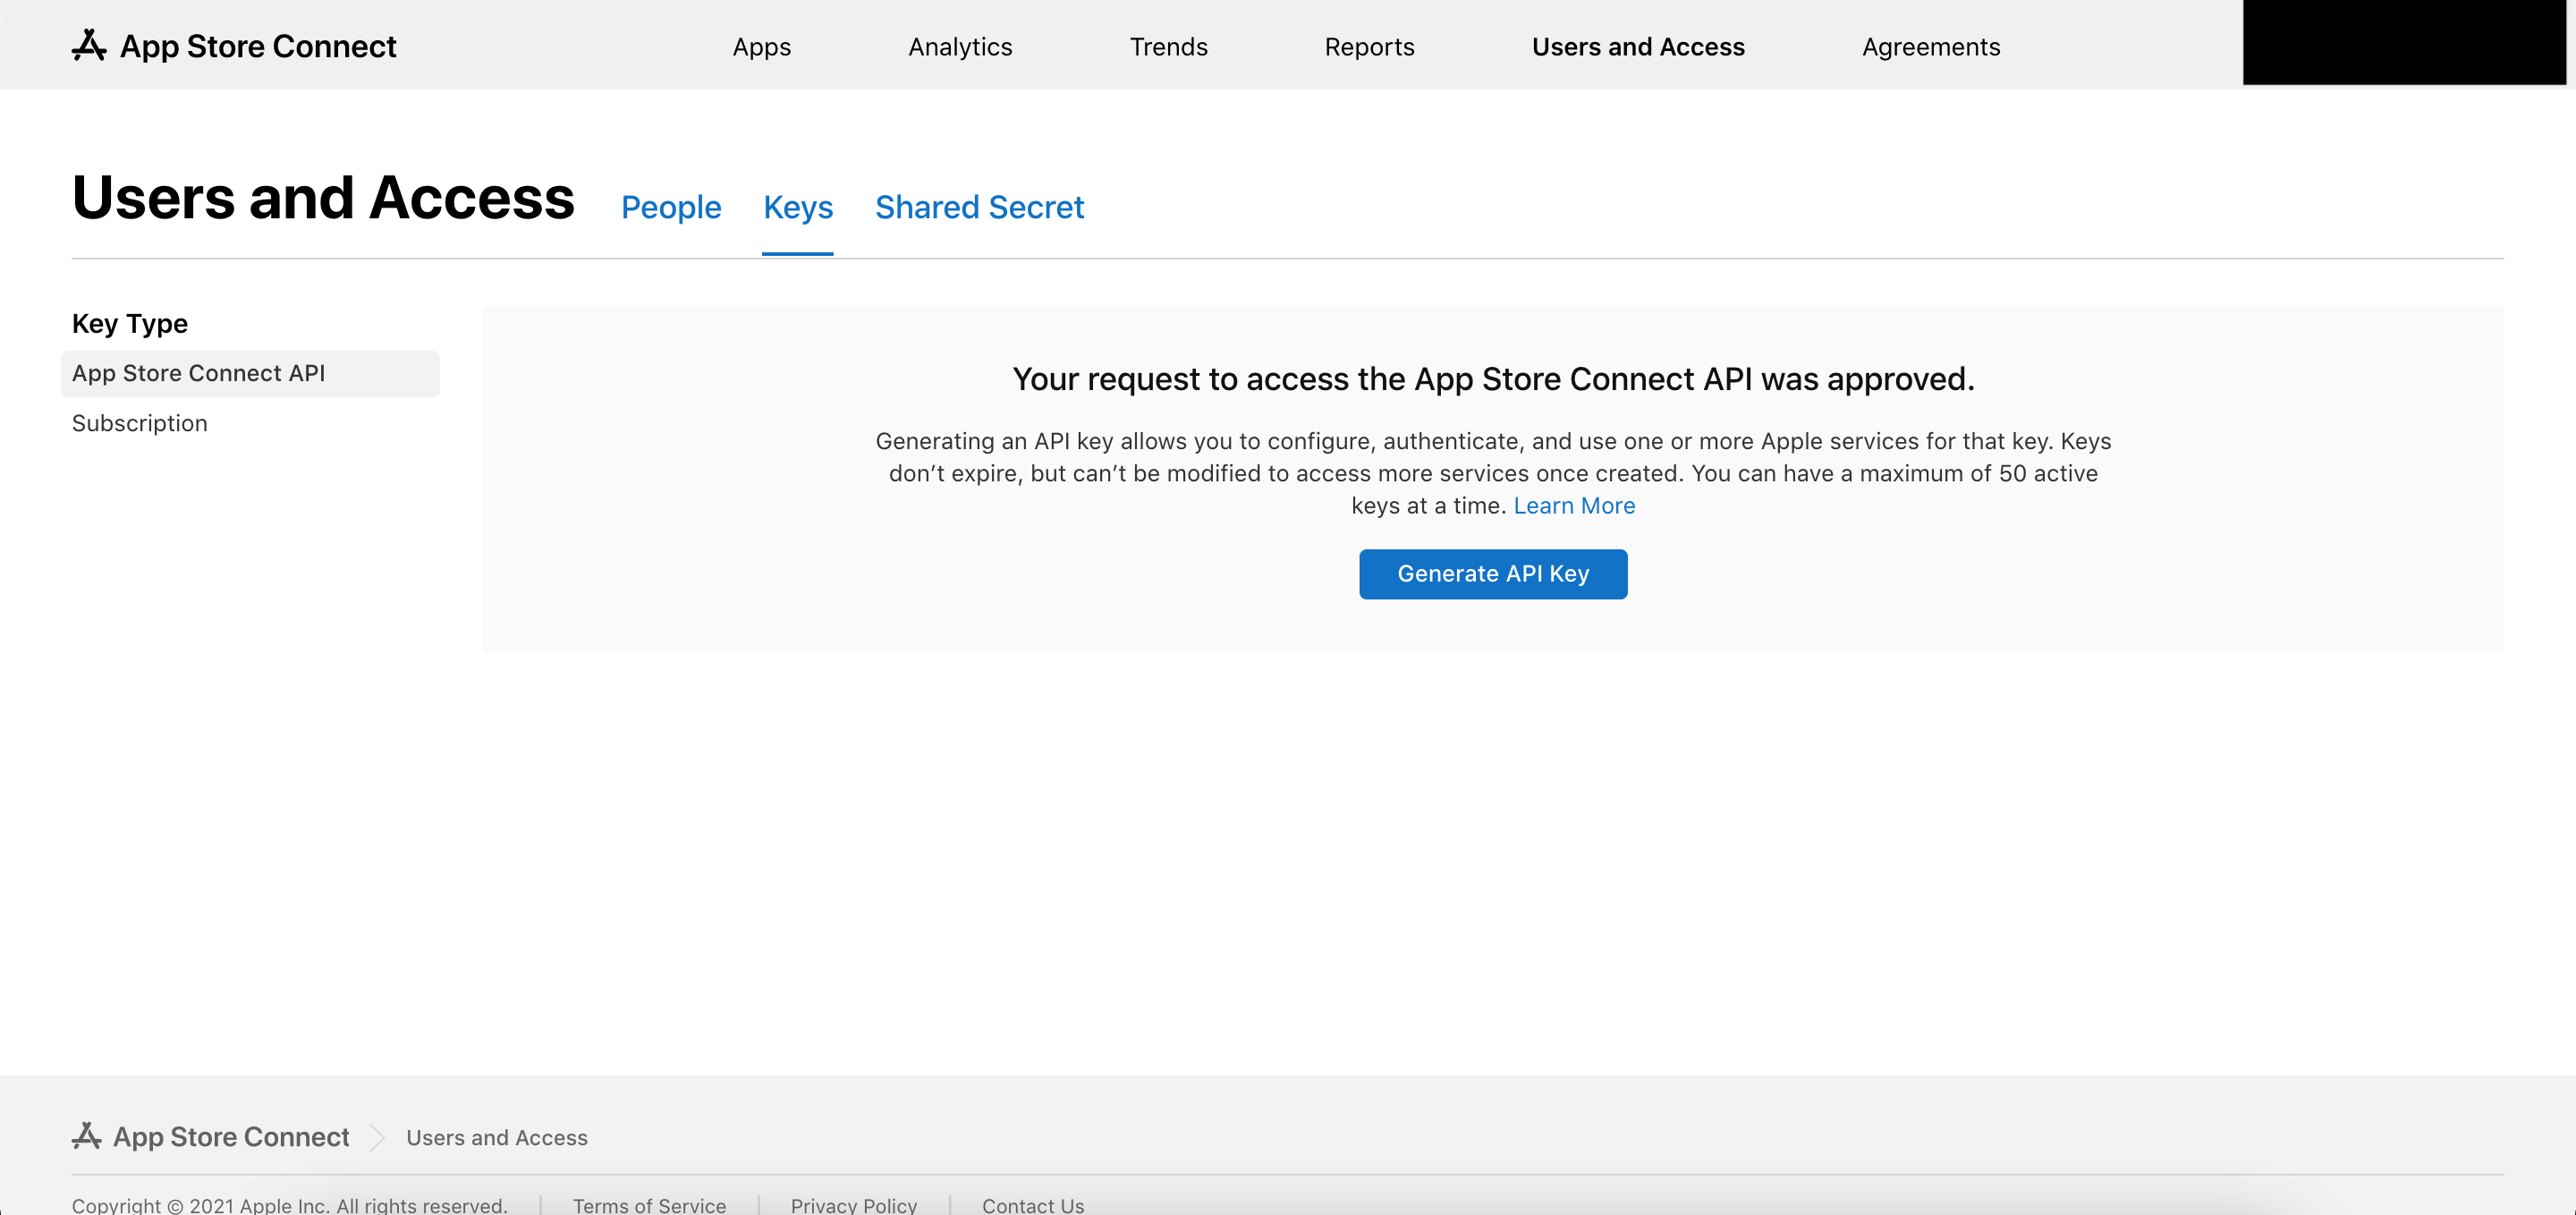
Image 3 - The result screen
For the account holder, the journey ends here. Now it’s your turn.
Step 2: Obtaining the key
For this part, you will have to have Admin rights, which is referred to in AppStore Connect documentation.
You will start as Image 3 shows, Users and Access, tab Keys. Now the process is still pretty straightforward. Just tap the magic button and you will see the form for key creation. Fill in the details (Image 4), the name is not substantial, but access has to be at least App Manager. Otherwise, your Fastlane pilot will fail when updating info as stated in Fastlane documentation. If you do not need to modify info, Developer access will suffice.
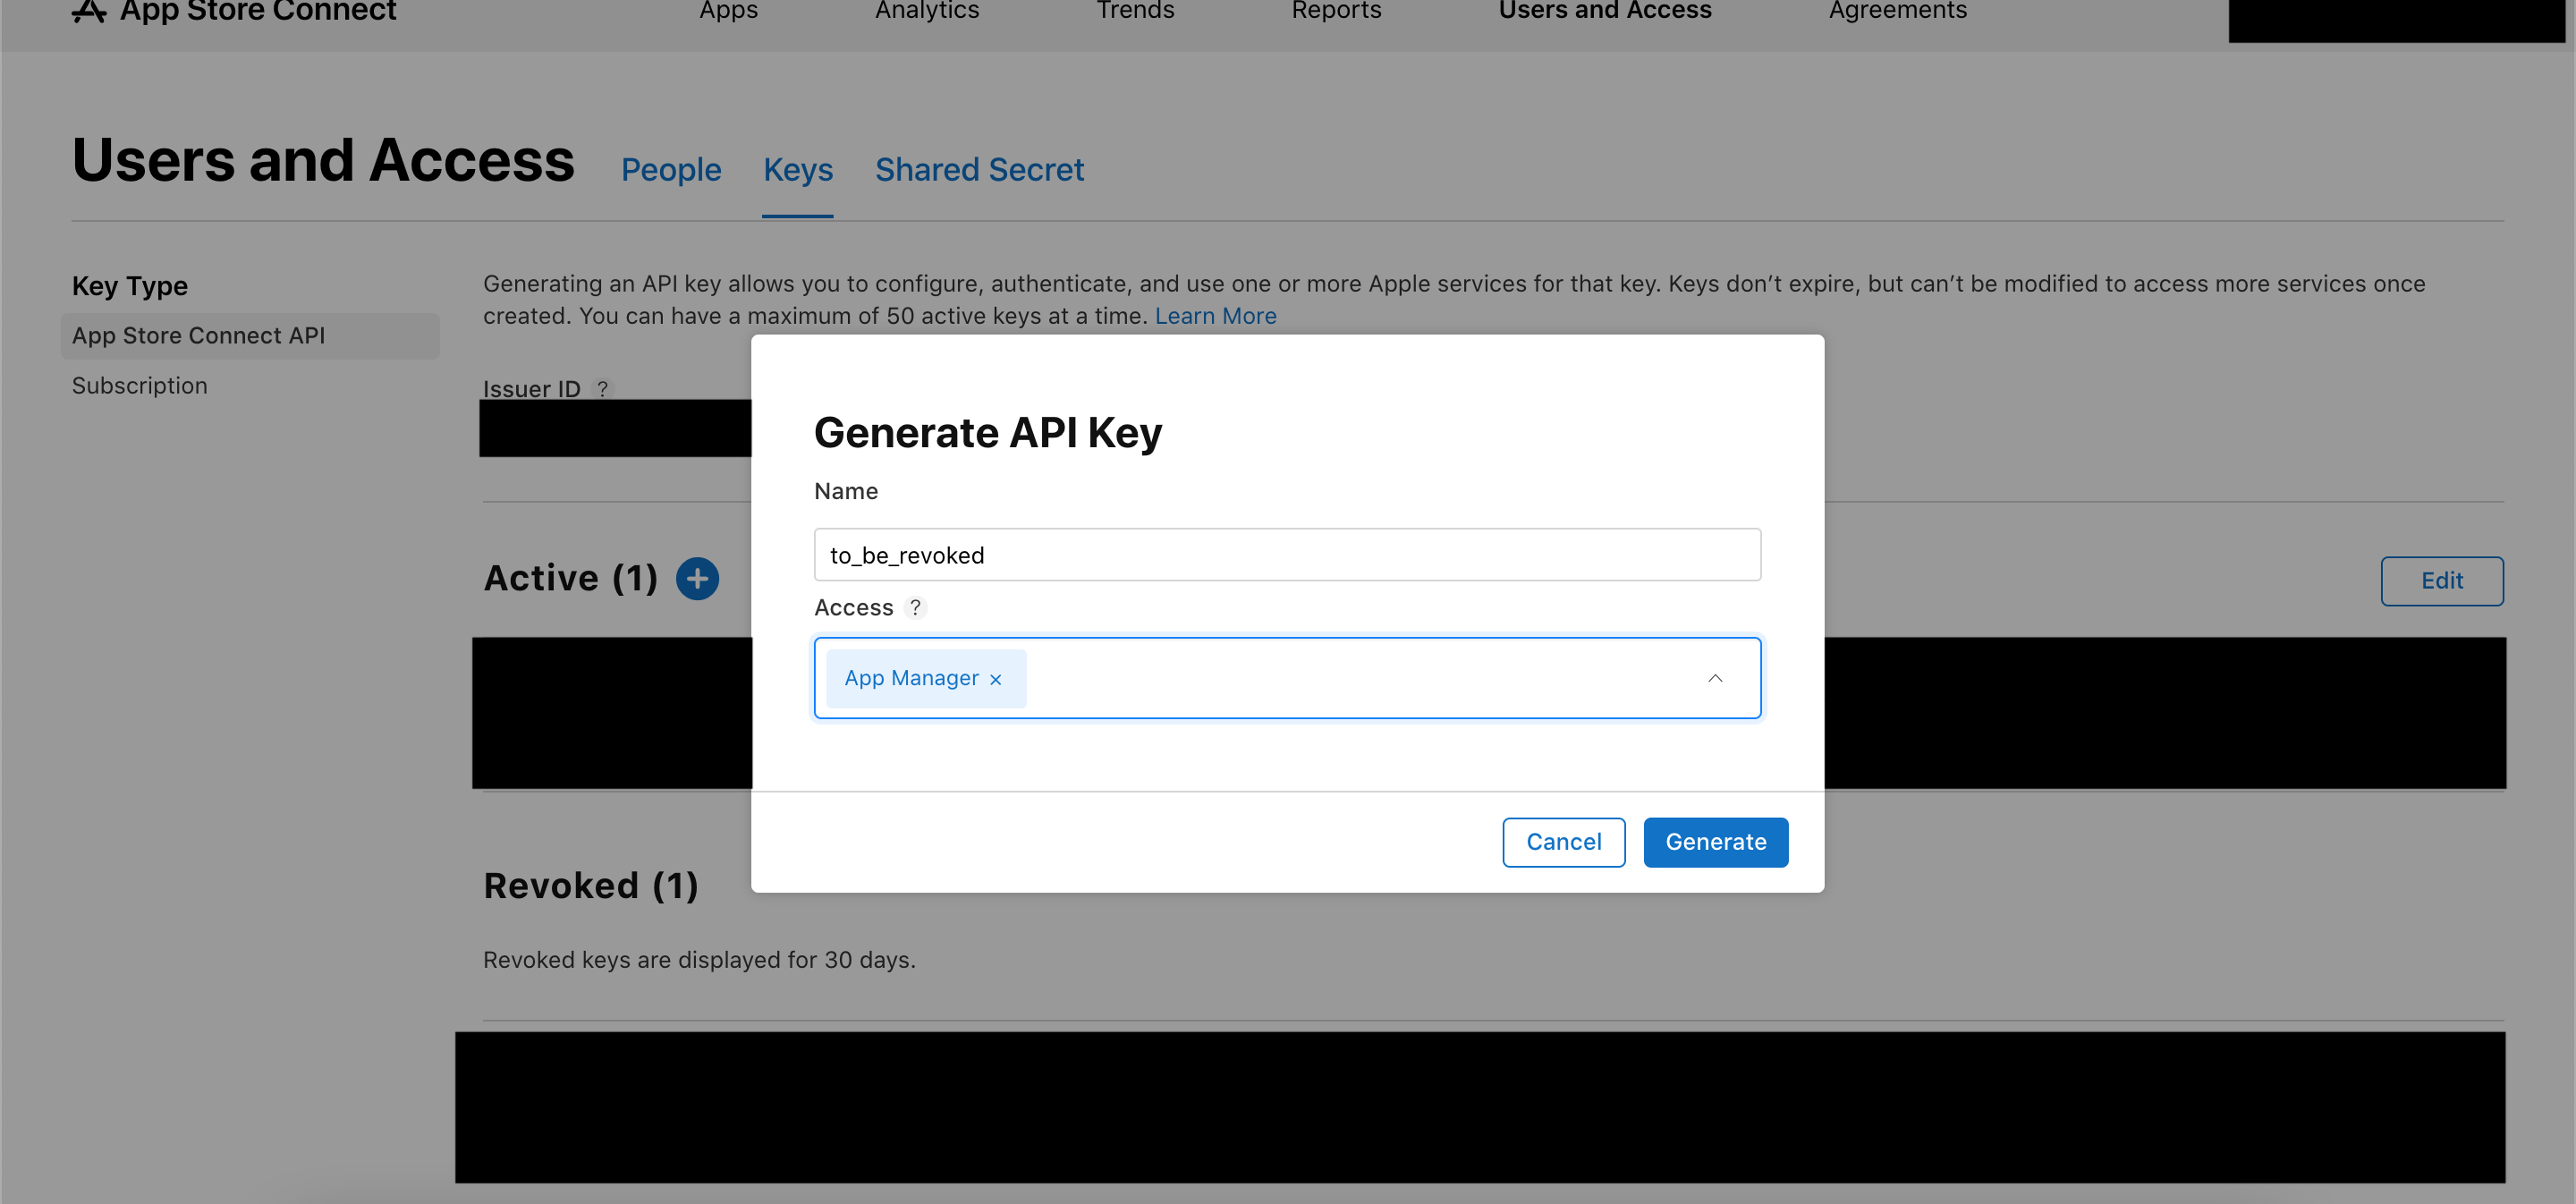
Image 4 - Access key form
Next, you will see your key has been created (Image 5). There are 2 values to take into account, Issuer ID (blue rectangle) and Key ID (red rectangle). You don’t need to write them down as they are always accessible to you. What is not always accessible, however, is the “Download API Key” button. You will be prompted about this when trying to download the key.
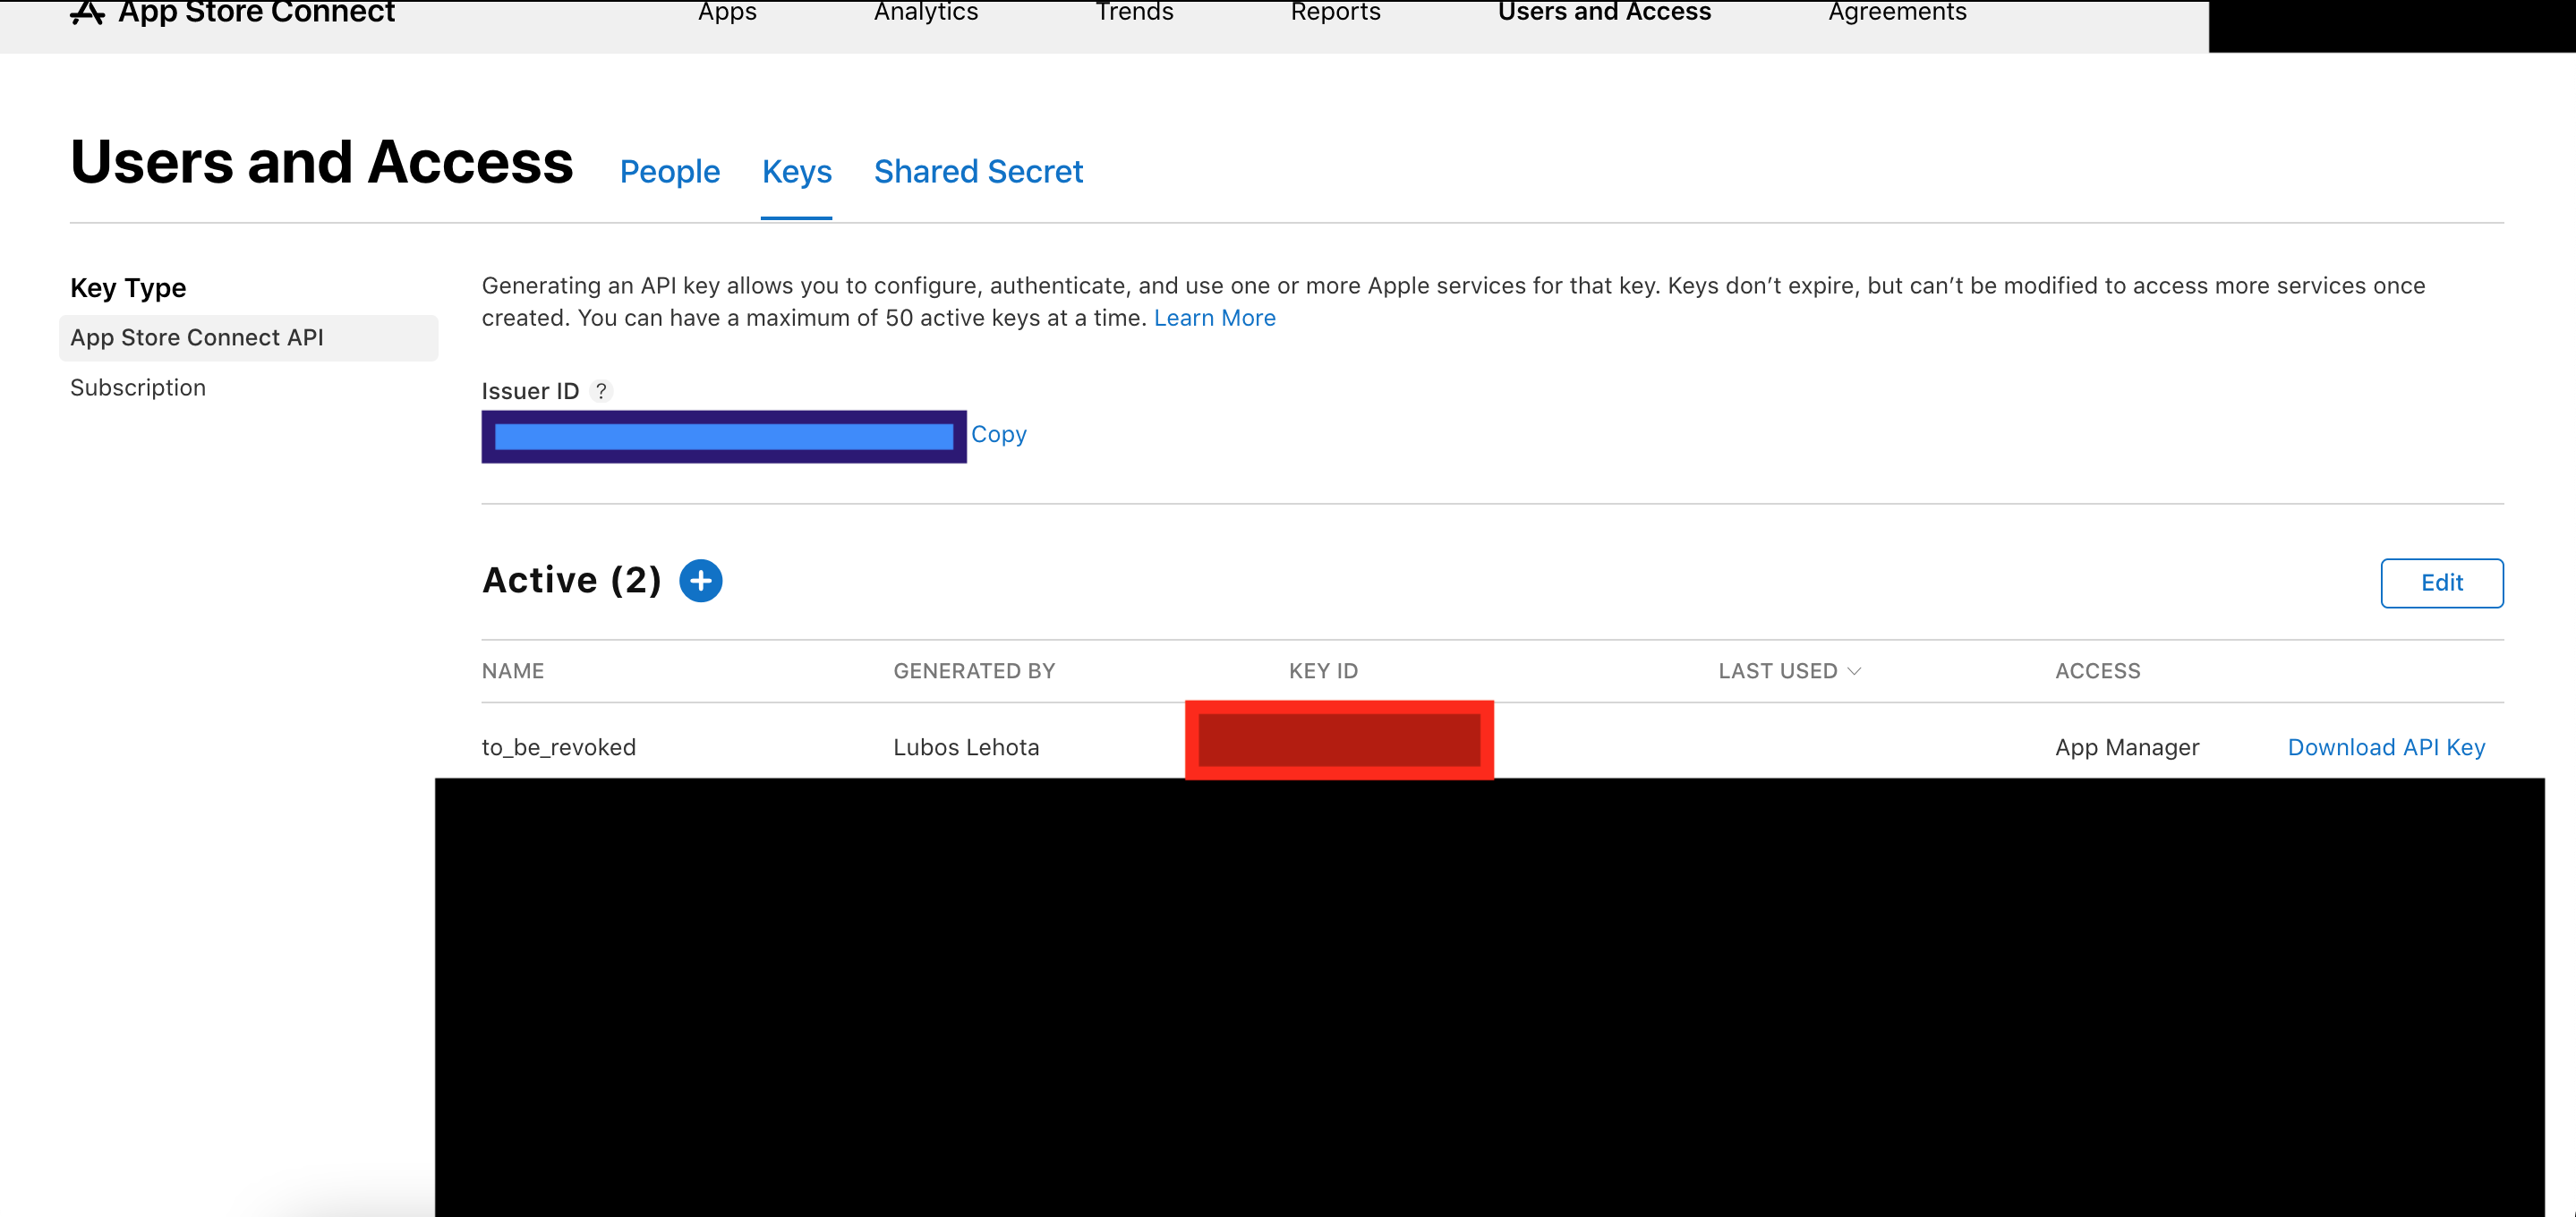
Image 5 - Newly created key
Step 3: Using the key
Now to the main part. Download the key. You can only download it only once, but it is not really a problem, just a mild inconvenience as you can always generate a new key.
There are two ways to use keys within the Fastlane script. One is by using the base64 encoded key directly and the other by using the json file described in the documentation.
I use the base64 encoded key. Open the terminal window and go to the folder where you have your key. Run the command cat {KEYNAME} | base64 and copy the result for later usage.
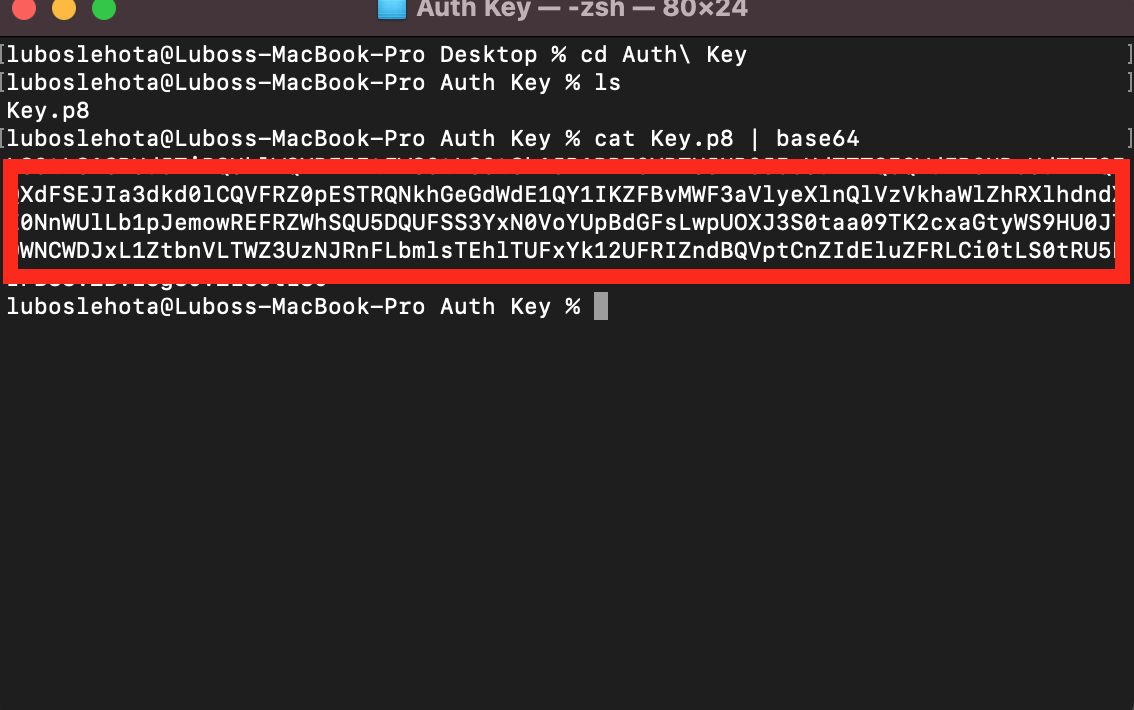
Image 6 - Writing out base64 key
Now that you have your key, you have to adjust your Fastlane and GitLab script. If you are not using GitLab, skip that part.
For the Fastlane script, you need to start using options from your lane. I have my base64 key as an argument with the name api_key supplied to a script. Now you may notice the colorful rectangles. The red one should be issuer id from Image 5, and of course, the blue one is the key id from the very same image. For reference, see my lane in fastfile in Image 7.

Image 7- Fastfile sample
If you don’t use any other tool which manages CI, you are pretty much all set. You may call your script as you did before, just add the parameter followed by “:” and value. For example, fastlane {MY LANE} api_key:”{MY KEY}”. If you do not want to manually input it every time, you might consider some kind of key storage, for instance, keychain. Then you may skip passing the argument to the lane, but that is a topic for another day.
GitLab adjustments
For this to work, you first need to go to your GitLab interface and set a new variable. Image 8 will help you find it. Add a name that will be later used in the script, for me it is APP_STORE_CONNECT_API_KEY and the base64 version of your key. Don’t forget to tick the box to mask it from logs (Image 9).
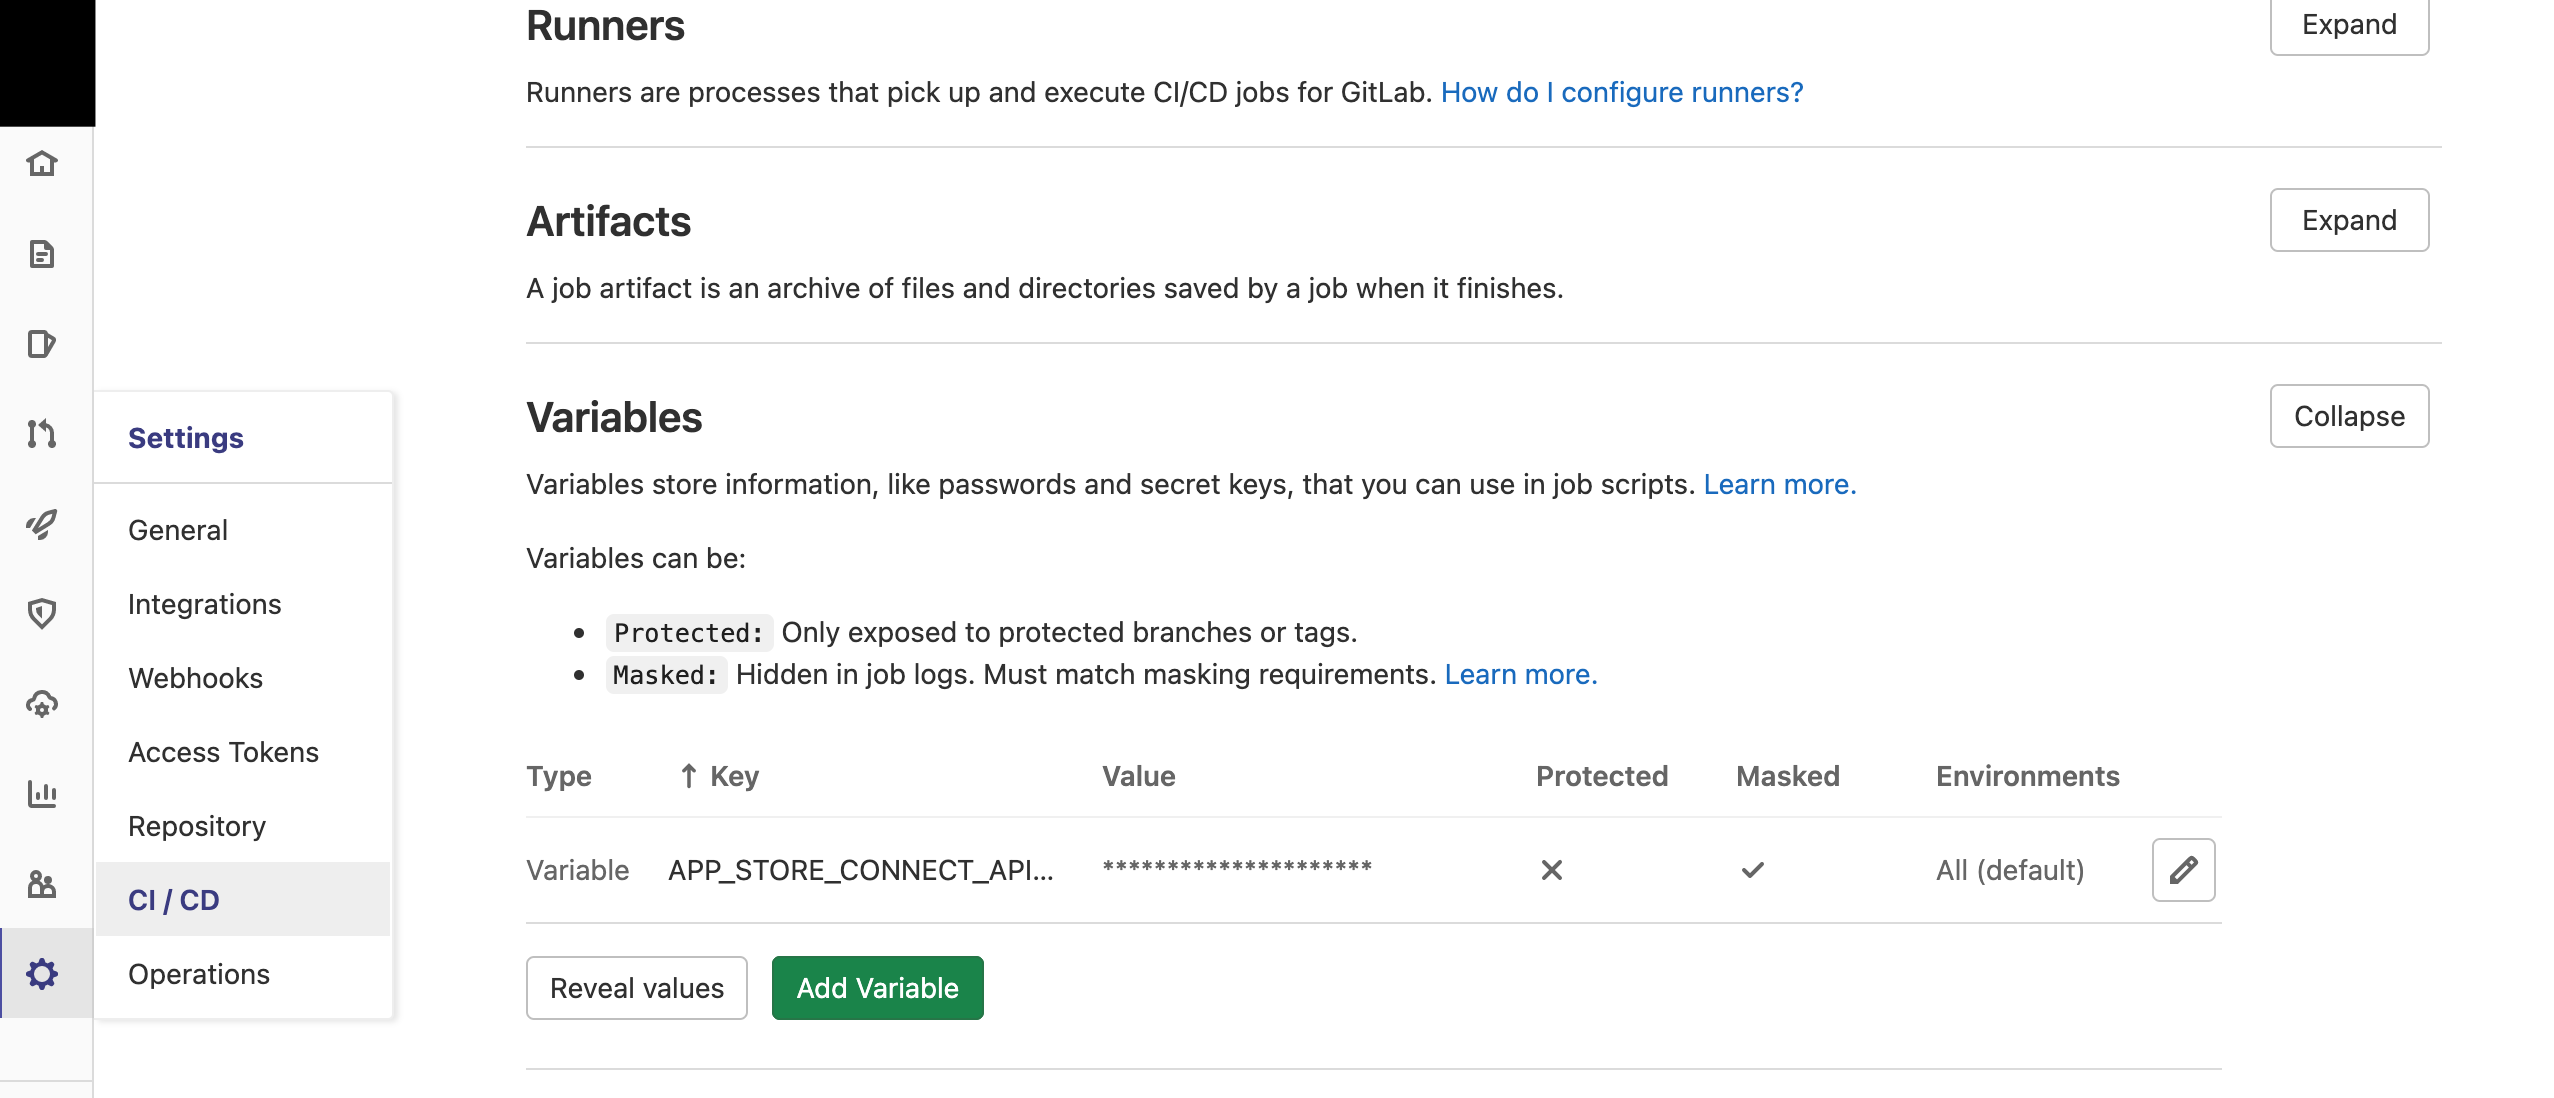
Image 8 - GitLab settings
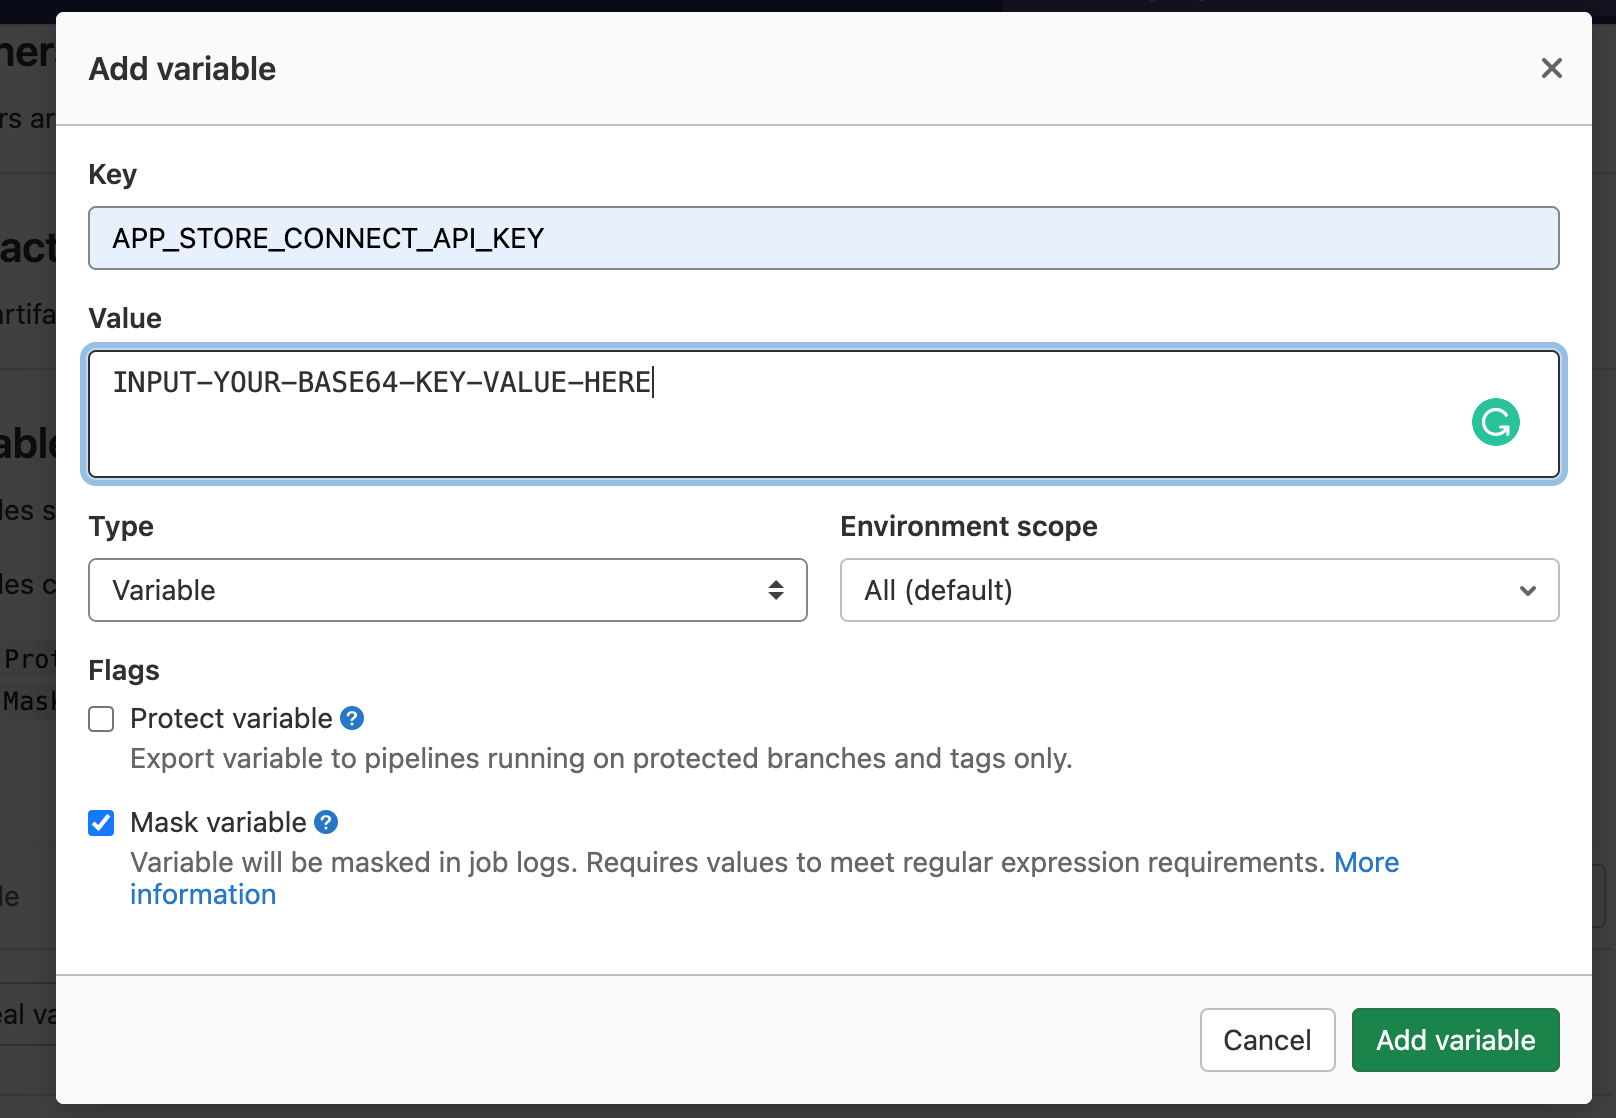
Image 9 - Adding a new variable
Now you have to adjust your Gitlab script. Open your .gitlab-ci.yml file and for every lane where you want to use the key add it as a named parameter as in Image 10.
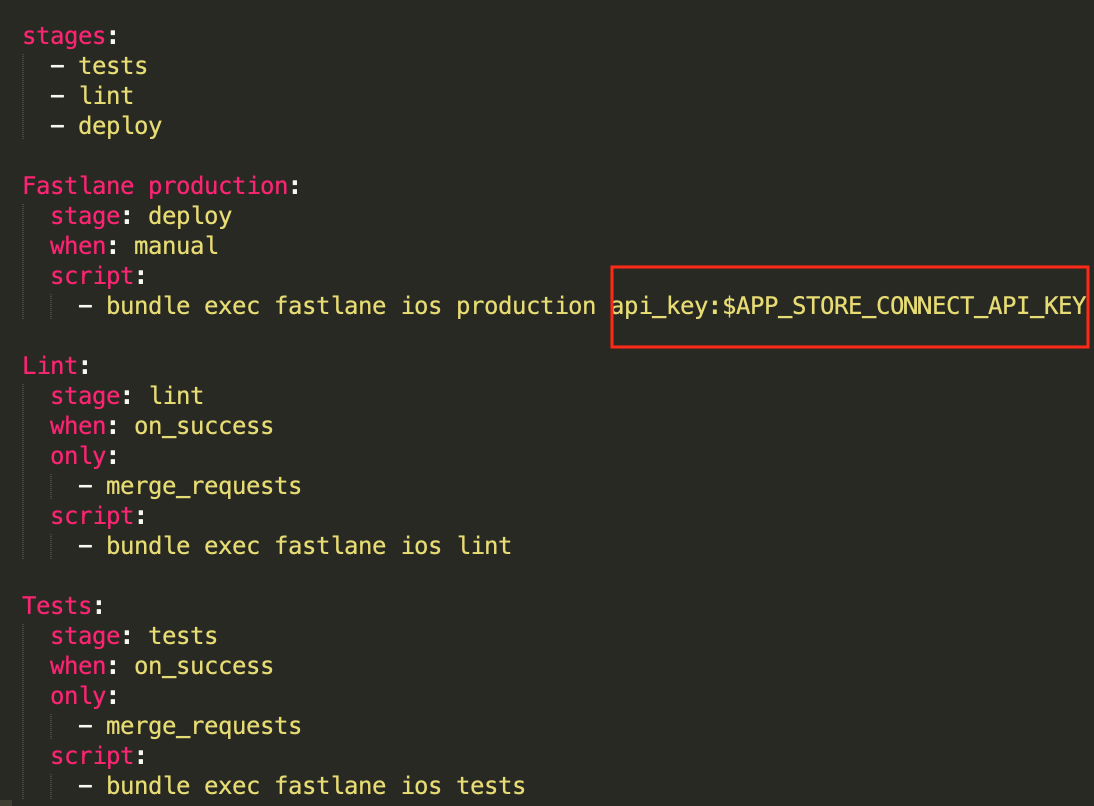
Image 10 - Script adjustments
Now you are all set to continue doing automated submissions with GitLab and Fastlane.
Shift your business forward
Get in contact with us to learn more
about how our IT services can add value to your business.

